Digital lab notebooks
What you need to do
Create your digital notebook –> OneNote and OfficeLens
Share your notebook with Dr Dohm –> tinyurl
Why digital notebook, aka ELN?
The justification for a digital notebook, also known as Electronic Laboratory Notebook, is that it will be easier for you to document the code and the results from your wet lab or bioinformatics (R statistical software, UGENE) work. A major component of doing research is to make sure that others can reproduce your work, i.e., that we do “reproducible research.” For data analysis, what this requires is that, with access to the original data and original computer code for a project, an independent researcher should obtain the same results. Over the last ten years, focus on being able to reproduce analytical choices made by researchers has become a major area of concern. You R statistical software uses Markdown to help format and generate pdf reports, which can be imported into OneNote. OneNote notebooks help share that work.
For more about lab notebooks and bioinformatics projects, please see the entry “How to Keep a Lab Notebook for Bioinformatic Analyses, ” at Addgene.org.
Can we share notebooks with our team?
Yes! Please do! At a minimum, share your pages from your notebook with the members of the class you work with for a particular lab exercise. For example, good lab practice is to assign roles: one person should keep records, another should do the calculations, yet another may be responsible for pipetting, and so on. Thus, the person who keeps records would share their OneNote page with the others.
How the notebook is set up
There’s latitude here, but some general suggestions will make it easier for all of us.
Name your notebook properly. For example, notebook name should include your name, the course, and the semester. Set up each week as a category, then add pages to each category. OneNote allows you to set up sections and add pages to sections. So, perhaps, create sections titled: Week 1, Week 2, etc., then, within the appropriate week, add page titles like: Yeast project, Brassica, PCR, etc.. , from the section headers in our course website. Within each section, add pages titled with the days date. You should also use metadata for every lab notebook page. A screenshot of a student’s notebook is shown below (Fig. 1). Note that use of weeks was employed, but “genomics lab” would not be a complete and proper name for the notebook (missing student’s name and semester).
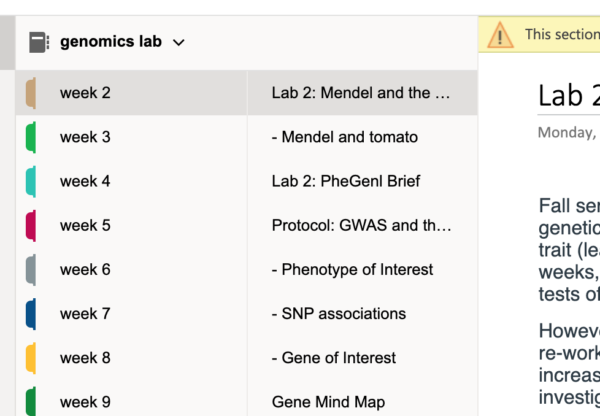
Figure 1. Screenshot of an example of a student digital notebook showing use of Weeks as categories, with pages nested within the weeks.
Arranging your notebook to reflect weeks is, I think, the most logical way to approach your lab notebook. Other organization is possible. Keep in mind that the goal is for you (and me) to be able to see evidence of the work you have done. And to find it easily.
Don’t forget to include a table of contents, as discussed in Lab notebooks. OneNote can set up a table of contents, with links to categories and pages for easy navigation. Instructions are provided at https://www.likeabosslearning.com/onenote-toc/
Do you have a page template?
I’ll show you by imager a suggested page format for a typical page (Fig. 2)
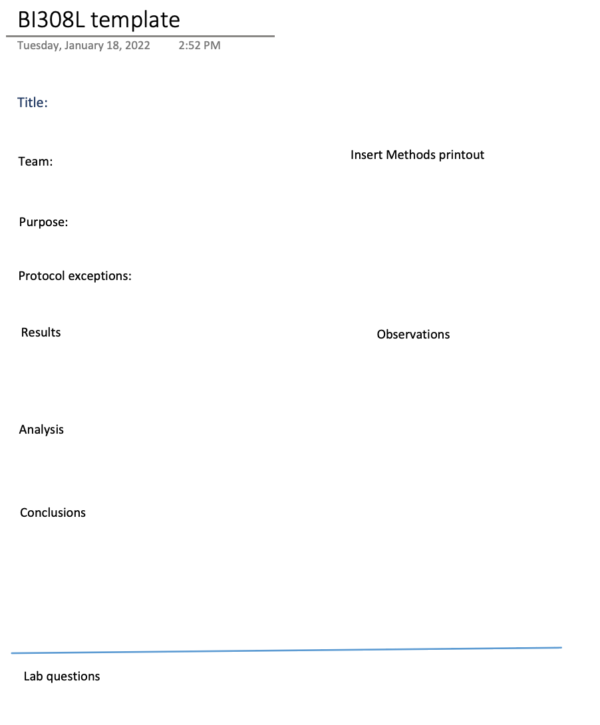
Figure 2. Screenshot of OneNote template for DrD’s lab notebooks. Replace BI308L template tile with descriptive lab title
Can I use paper?
Yes! Keep a composition book if you wish, or even loose pages. Then use your smartphone camera to scan your pages into your digital notebook. Your notebook grade is based on the digital notebook. Up until December 2020, Microsoft provided a free app called OfficeLens, which linked your Windows PC to your OneNote notebook and automatically added images for you. The app is still available for iPads/iPhones and Android phones through the stores you typically use to obtain apps — the app will sync to OneNote and or OneDrive.
Notebook metadata
Metadata is data you enter that describes and gives information about other data. It is important that all files you submit, all entries to your lab notebook, includes appropriate information about the file or assignment. Wikipedia has a good general description of metadata. Metadata use and quality is a growing concern in Biology and related disciplines (Gonçalve and Musen, 2019).
For example, if you submit a file, adhere to proper file naming protocols. In addition, the first few lines of the file should include relevant descriptive elements
- Title of the experiment or activity
- The date experiment or activity was done
- Your name
- Names of others you worked with
- Experimental strategy
- Organism used
- Cell line
- Instruments used
- List of supplies
- Software or apps used
- Websites and other literature used
- Other relevant comments about the experiment
Most of these elements are self-evident. The list is not exhaustive. For example, simply listing names of apps is not sufficient; you must also include a statement about settings, version number, and other relevant information. Experimental strategy implies that you provide an overview of treatments, sample number, etc. used for your experiment. Other relevant comments might include names of supporting files, like list of primers.
These same descriptors should appear in pages of your lab notebook. Note: clearly, not all descriptors are relevant to an experiment or assignment or other document you may produce during the class. Elements 1 – 4 are likely to be relevant to all words and so should be mandatory part of your metadata entries.
An example of metadata for a spreadsheet file I created appears below (Fig. 3)
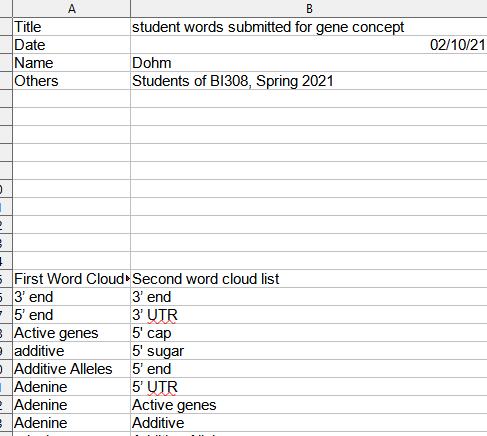
Figure 3. Screenshot of a worksheet with metadata entries.
OneNote instructions
Visit office.com and, logon with your Microsoft account information. If you have not already done so, create an account, it’s free, whether you own a Chromebook, LINUX, macOS, or Windows 10 personal computer. If you own a windows 10 computer, then most likely you already have an account. Make sure that you have set up sharing properly (this is done through OneDrive). Trouble will follow if this step is not addressed.
Which account should I use?
My advice — Please use your personal email to sign on for a Microsoft Account, not your Chaminade email, as explained in class. Note that this should not be an issue now, since in April 2021, Chaminade has made access to Office 365 available to all faculty. However, I have found that troubleshooting private accounts has been simpler than Chaminade accounts, so my advice still stands.
I don’t know how to use OneNote
For a quick overview about OneNote, check out this article in LifeHacker. A quick search through YouTube will also find answers to most questions you have about OneNote, from adding images, to entering text, etc.
Once you are logged on to Office, you should see a welcome screen like the one below (Fig 4)
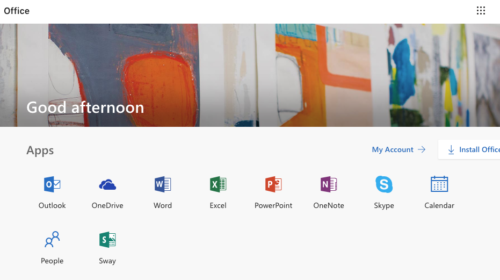
Figure 4. Screenshot Office.com welcome page after logon.
Contact Dr Dohm via the Messages system if you have difficulty with logon to OneNote. I highly recommend you install the OfficeLens app on your phone or tablet. Office Lens provides scanning capability to your phone and syncs with your OneNote digital notebook via your 2 gb free OneDrive space.
Select OneNote and create a digital notebook for this course.
My Notebooks, click on +New and start your new notebook (Fig. 5). Give it a name that makes sense. For example, for my imaginary student Joe Key, their notebook would be “Genetics Lab Joe Key” (Fig. 5). Variation is allowed, but at a glance, you (and I), should recognize it for what it is.
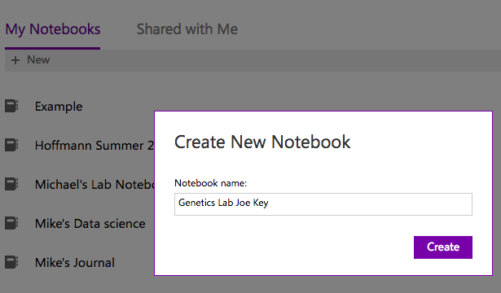
Figure 5. Create your new notebook
Share the OneNote digital notebook with your instructor
After creating the notebook, go ahead and share it with me. Make sure you set permission so that I can edit your notebook. I’ll provide a link after this description for you to submit your link to me.
Sharing is simple. Look for a Share link icon at the upper-right of your notebook (Fig 6).
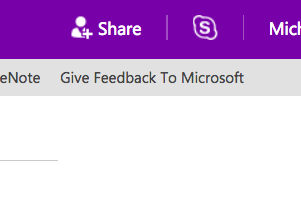
Figure 6. Screenshot of notebook with the share link
I want you to copy the link, not send me links via email, so at the left, find the “Get a link” option and click on it (Fig. 7)
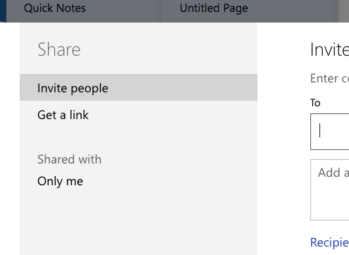
Figure 7. Screenshot of notebook with share options visible: Select “Get a link”
I need to be able to edit your notebooks, so make sure that the “Edit” is visible before you proceed (Fig. 8)
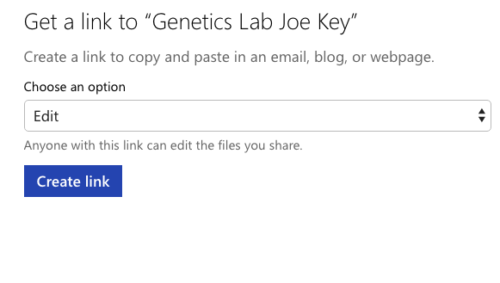
Figure 8. Screenshot of notebook with the share link; choose an option should include “Edit.”
Press “Create link” and on the next page you’ll see a long file link. Copy the link (now in your clipboard) and paste it into a document somewhere for your own safe keeping.
What to do
With respect to your data, do use your spreadsheet app to organize and tabulate your data. Do include images. Do write about changes to protocols. Do take advantage of the features of OneNote to make your ELN useful.
What not to do
Do note take screenshots of results from your spreadsheet. We can’t access numbers or text from images, which defeats the purpose of listing your results in a spreadsheet. Instead, copy and paste them into your notebook. Or, if the worksheet file is large, link to the file stored in your Onedrive (you’ll have to make it a shared link).
Avoid using Google Drive. If you must share a file, move it to your Onedrive. You get 2 GB free storage, more than enough for a lab class.
Make a tiny URL
Note: Images need to be updated, the site looks different now. Note: TinyURL images are up-to-date at CANVAS Submit your notebook URL page.
Next, go to tinyurl.com and translate that long link you made to your digital notebook to something shorter (Fig. 9 and Fig 10).
Note: TinyURL has been updated, these images were current as of 2020. The instructions remain the same.
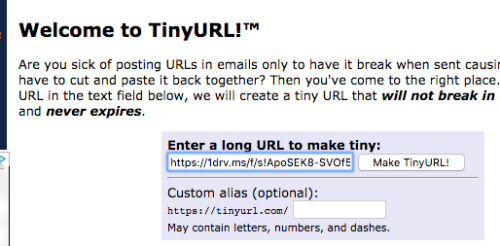
Figure 9. Paste the long link to your OneNote digital notebook into the box at tinyurl.com. Press the “Make TinyURL!” when you are ready
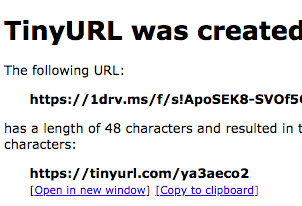
Figure 10. Click on the “Copy to clipboard link to grab the new, shorter link to your notebook.
Once you have your tinyURL link and the original long-form URL, paste this information into the available text box at Submit your notebook URL. You will also be prompted to enter this information at First Lab notebook Check and again at Last Lab notebook Check
References
Gonçalves, R. S., & Musen, M. A. (2019). The variable quality of metadata about biological samples used in biomedical experiments. Scientific data, 6(1), 1-15.
/MD