How to merge text files
This page demonstrates how to merge text files using shell commands and the terminal.
As discussed, tree files created in UGENE by any of the tree-building methods (Neighbor Joining, Mr Bayes, IQ-TREE, or PhyML) report results in a tree format called Newick, with file extension .nwk. These .nwk files are just text files and can be treated as such (e.g., see Working with Newick and other phylogeny file formats). To complete your work with gene trees, I asked that you submit up to four Newick file contents to Submit Newick file here. In other words, I asked that you merge (or concatenate) your four .nwk files into a single file. Of course, one way to do this is to open each tree file in your text editor, then copy/paste the code into the CANVAS text box. That works fine, but there are better ways, i.e., ways that automate the process, to merge text files. And that’s the purpose of this page, to introduce you to how to merge files using commands entered in your terminal (macOS) or PowerShell (Windows 11). Once completed, you’ll have a script that automates the process of merging files.
We begin with Windows; for macOS, scroll down or click here.
Windows 11
PowerShell is Microsoft’s answer to UNIX-like command line interfaces or shells. It provides a comprehensive scripting language, which can be used to do many tasks, from simple ones like ours (combine files) to automating complex system management. PowerShell is built-in to Windows 11 and is available for macOS, too.
First, open an instance of PowerShell.
In File explorer, navigate to and select (single left-click) your working folder. In this example the folder is called Aldh1a2.
Open PowerShell by right-clicking on the folder icon, then scroll down and select Open in Windows Terminal (Fig. 1)
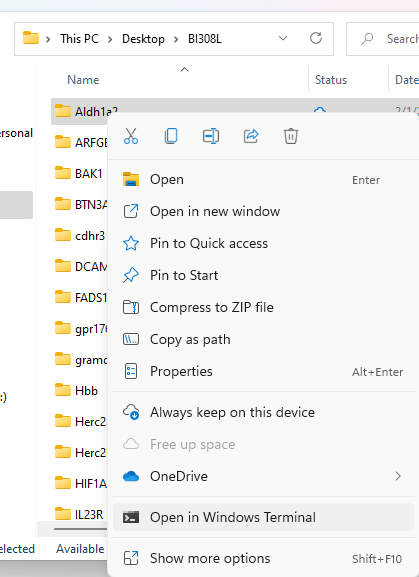
Figure 1. Screenshot popup menu File Explorer, opened within the folder Aldh1a2
You should see a screen open like the one in Figure 2. Confirm that PowerShell is opened within correct working folder
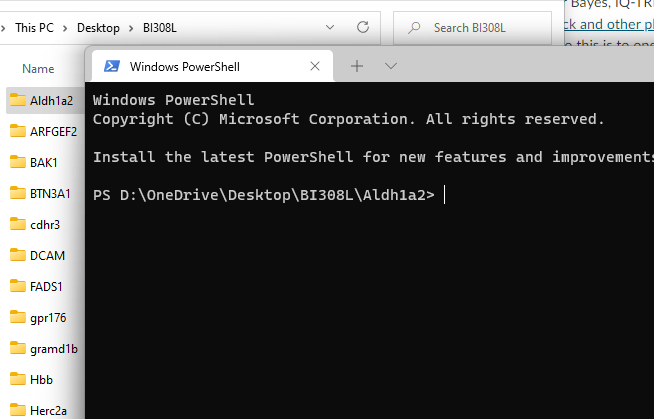
Figure 2. Screenshot of PowerShel on Windows 11 PC. View of File Explorer in background.
Commands
I provide a simple code snippet that will work. It’s by no means the best, or the most general. It works only if you are in the folder and that folder contains at least one .nwk file. There’s a huge amount of coding you can do, way past what I want to introduce here. For those of you interested in learning more about PowerShell, start with Microsoft.
Our first command, list (ls) all of the Newick files in the folder. The command is
ls *.nwk
Output is shown in Figure 3.
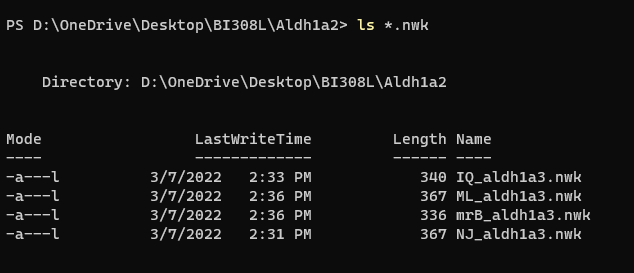
Figure 3. Screenshot PowerShell, listing all Newick files in the folder
The * asterisks is called a wildcard, by placing it before the .nwk extension we ask for all files that match to be listed. ls is an alias for Get-ChildItem, which has many possible options (see Microsoft).
Now that we know to expect four Newick files, use the following script to merge the files. Highlight and copy the entire line of code. re-typing is not recommended
ls *.nwk | foreach-object { $fname=[System.IO.Path]::GetFileName($_); get-content $_ | foreach-object { echo $fname":"`n$_`n >> outfile.txt}}
code adapted from https://www.donationcoder.com/forum/index.php?topic=46480.0
Briefly, the script collects all the Newick files (sorted alphabetically), then sends the filename ($fname) and output of each file ($_) to a new file called outfile.txt. The 'n commands PowerShell to tart a new line. You can confirm the script works by viewing the file directly (use cat outfile.txt in PowerShell, Fig. 4), or by opening in your text editor. Make sure there is no file called outfile.txt in the folder — this command will simply add to that existing file.

Figure 4. Screenshot view of outfile.txt
macOS
Underneath that pretty user interface is a UNIX-like computer, just waiting for your command. Sorry, had to say that. So, let’s introduce you to Terminal. We begin like our Windows 11 story: starting Terminal from your working folder.
Navigate within Finder to your working folder. In this example my folder is named Aldh1a2.
Select the folder, then right-click to bring up the menu. Scroll down and select Services, then New Terminal at Folder (Fig. 5).
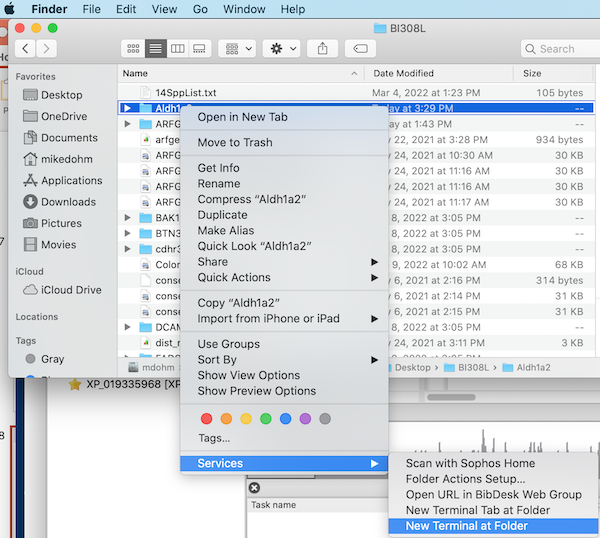
Figure 5. Screenshot Finder menu, select New Terminal at Folder
A new window will popup, the Terminal shell (Fig. 6).
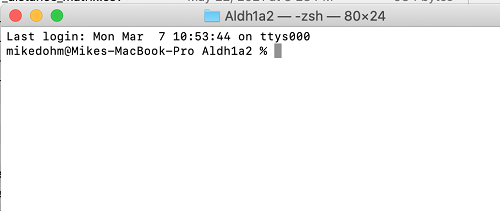
Figure 6. Screenshot portion of Terminal shell.
Commands
As discussed for PowerShell introduction, I provide a simple code snippet that will work. It’s by no means the best, or the most general. It works only if you are in the folder and that folder contains at least one .nwk file. There’s a huge amount of coding you can do, way past what I want to introduce here. For those of you interested in learning more about Terminal and UNIX commands on your macOS, start with Apple.
Our first command, list (ls) all of the Newick files in the folder. The command is
ls *.nwk
The * asterisks is called a wildcard, by placing it before the .nwk extension we ask for all files that match to be listed (Fig. 7).

Figure 7. Screenshot portion of Terminal showing output from ls *.nwk command
Now that we know to expect four Newick files, use the following script to merge the files. Highlight and copy the entire line of code. re-typing is not recommended.
awk '{print FILENAME, ":", $0,"\n"}' *.nwk > outfile.txt
Briefly, awk is a command utility that works on files based on patterns. The script here collects all the Newick files (sorted alphabetically), then sends the filename (FILENAME), the colon field separator ":", and output of each file ($0) to a new file called outfile.txt. The \n instructs Terminal to start a new line. Make sure there is no file called outfile.txt in the folder — this command will simply add to that existing file. Open your new merged file in your text editor, or use the same cat outfile.txt command as described above for PowerShell users to view (Fig. 8).

Figure 8. Screenshot of Terminal with awk command and cat command in view
Video
Here’s a narrated video of the steps used to concatenate files on a mac.
/MD