Use of NCBI Taxonomy page to retrieve phylogeny
SOP NCBI Taxonomy tool
This generates a phylogeny with many unresolved polytomies and is not our best choice. See Make a phylogenetic tree for better options. See also An example consensus phylogenetic tree.
Step 1. Go to NCBI Taxonomy and then select “Common Tree. (red arrow, Fig 1).
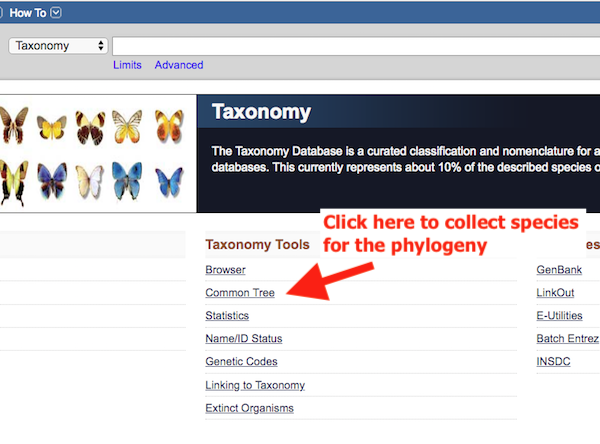
Figure 1. Homepage of NCBI Taxonomy
Step 2a. After clicking on “Common Tree,” you will land on a new page titled “Taxonomy Browser” (Fig. 2). Enter the first species name (Enter name or id) into the empty box (Fig 2 shows “Alligator”), the click the Add button. Figure 3 shows the results: Alligator is added to the Taxonomy Browser listing.
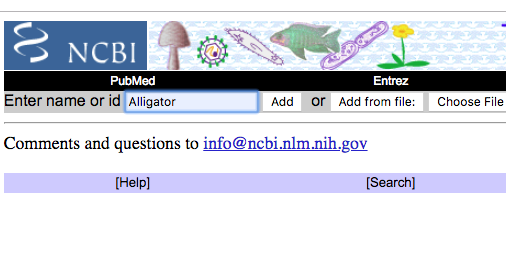
Figure 2. Partial screen shot of Taxonomy Browser page, with our first species entered into the text box, before clicking on Add button.
Step 2b. For each of the next 13 species, repeat Step 2a. Species are added to the Taxonomy Browser window (Fig 3).
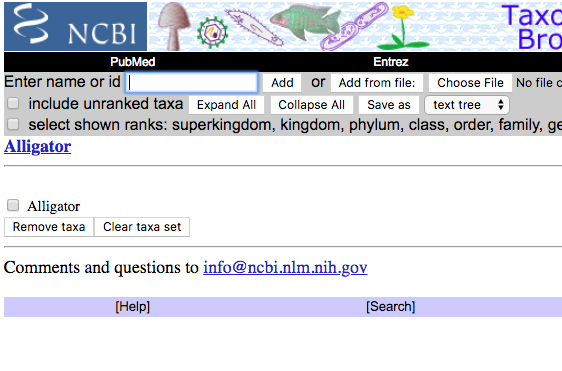
Figure 3. After adding “Alligator,” we see the selection in the Taxonomy Browser list window, along with an option to remove the taxa from the list (lower portion of the screen).
Step 2c. Alternatively, instead of one at a time, you can try a text file with all 14 species named, one on each row. After creating the text file (Notepad or TextEdit, save as text only), from the homepage of Taxonomy Browser (Fig 2), click on the “Choose file” button, and select from your computer the text file (e.g., Fig 4).
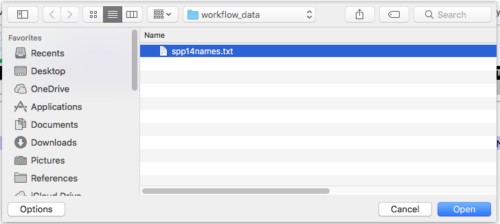
Figure 4. Screen shot of my Finder window (macOS); you can see the file I want “spp14names.txt.” Highlight your file, then click “Open” button.
After adding all of your species, whether one at a time or all at once from a text file, you’ll have a filled browser list like the one shown in Figure 5. Once you are at this step, you may need to add or modify the listings to match our Table 1 listings. After editing is done, you are ready to complete the exercise.

Figure 5. A completed listing of species, now ready for tree building.
Step 3. What we aim to do now is to download a file that we can view in another program called TreeViewer. From the Taxonomy Browser menu, uncheck the box “include ranked taxa,” then select “phylip tree,” and click on the “Save as” button (see Fig 6).
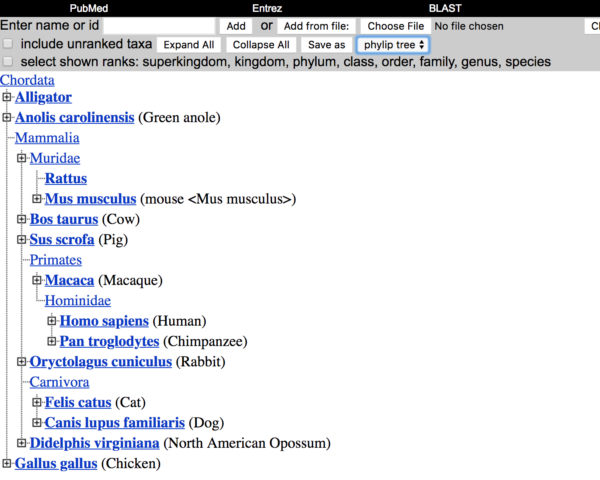
Figure 6. Screen shot of Taxonomy browser, shows location of buttons and options needed to complete Step 3.
Step 5. Find the downloaded file on your computer. It will be called “phyliptree.phy”. It’s just a text file, so if you want, you can view it in your text editor. A portion of the file is shown in Figure 7.
phylip.phy
(
(
(
(
(
‘Bos taurus’:4,
Figure 7. Portion of a phyliptree.phy text file as seen in a text editor.
Step 6. To view the file, there are several options. Many tree viewing programs could work with this file, unfortunately our UGENE needs a different format (Newick), so we will view our tree with a simple choice — use NCBI Treeviewer (new to NCBI as of Fall 2015), then convert the file into the Newick file format that UGENE prefers.
Figure 8 shows a screenshot of the home page. Note that the homepage is confusing. We want to find a button called “Upload”, about half-way one the page (red arrow, Fig 8).
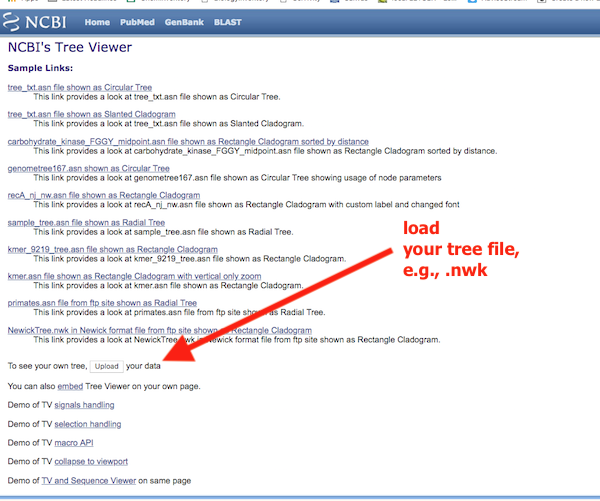
Figure 8. Homepage of TreeViewer; look for the “upload” button to start.
Step 7. Load your phyliptree.phy in the popup menu (Fig 9); Browse your computer to locate the file, then click “Upload” button when ready. Note that I selected Data file in the browser.
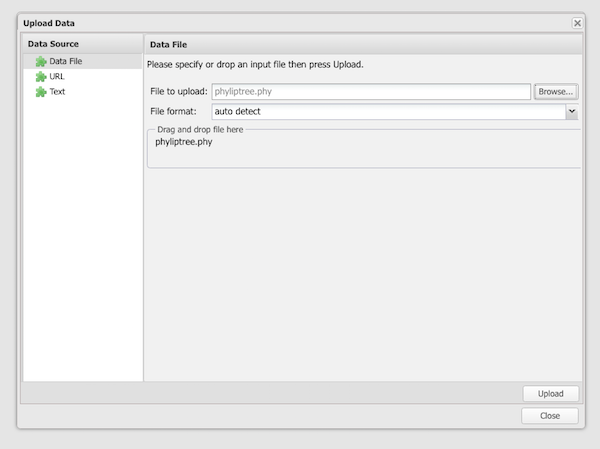
Figure 9. Popup menu in TreeViewer used to select and upload a phylip tree data file.
Step 8. Once you have the tree loaded, explore the options in the program to change the view to a Rectangle Cladogram. You should also explore how to swap branches to improve the readability of your tree. (e.g., partial menus shown in Fig 10 & Fig 11).
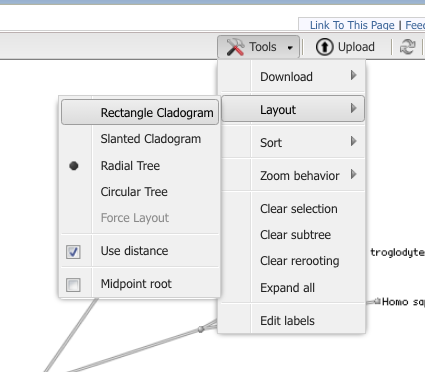
Figure 10. Partial view of Tool menu menu to change how the tree looks
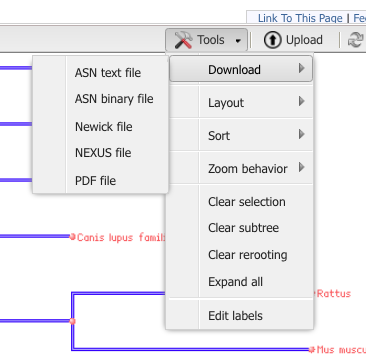
Figure 11. Partial view of Tool menu menu to change how the tree looks; try with and without distance
Step 9. Download an image of your tree as a pdf file.
Step 10. Download your tree as a Newick file (Fig 12).
Update: We’re not quite done! Although you have a newick-styled tree file on your computer, TreeViewer adds names to the internal tree nodes, which UGENE rejects. So, you’ll have to do some modest editing of the tree.nwk file with your text editor. Instructions are provided at Working with Newick and other phylogeny file formats, which is located in the Bioinformatics Resources and Help section of this website.
Step 11. Once you have a standard Newick file, start UGENE, open your Project, Open as… your newly created phylogeny from NCBI. UGENE should provide a context menu to confirm the file format (Fig 12); load the file, and save to your project. View the tree in UGENE.
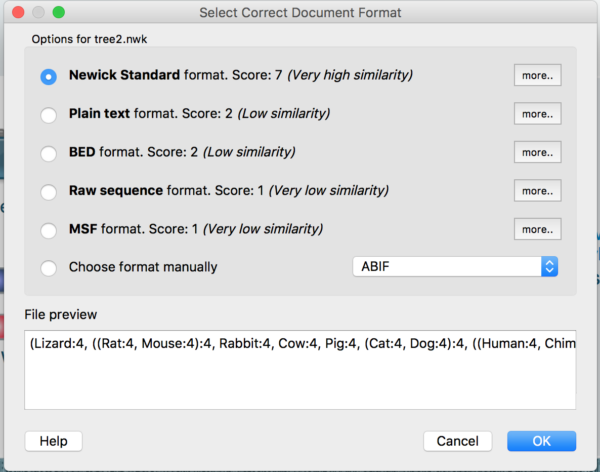
Figure 12. File format menu in UGENE
You will need this tree later in the Project when you compare your gene tree against the known phylogeny (reconciliation).